Find a deck
Choose a space from the space switcher. Open a folder in the tree to show its immediate contents. The breadcrumb identifies the current location. Browser Back, reload, and a copied Library address preserve the folder and selected item.
Select a deck to show its details in the panel. Select Open to edit it, or Start session to teach from its saved content. A double-click opens the item. Use Search decks to search across folders; results include their locations.
The space root can hold decks directly. To file a deck more specifically, create a folder or move it into an existing folder.
Where List and Tiles are offered, choose the view that helps you find the file. Select an item in either view to use its details panel.
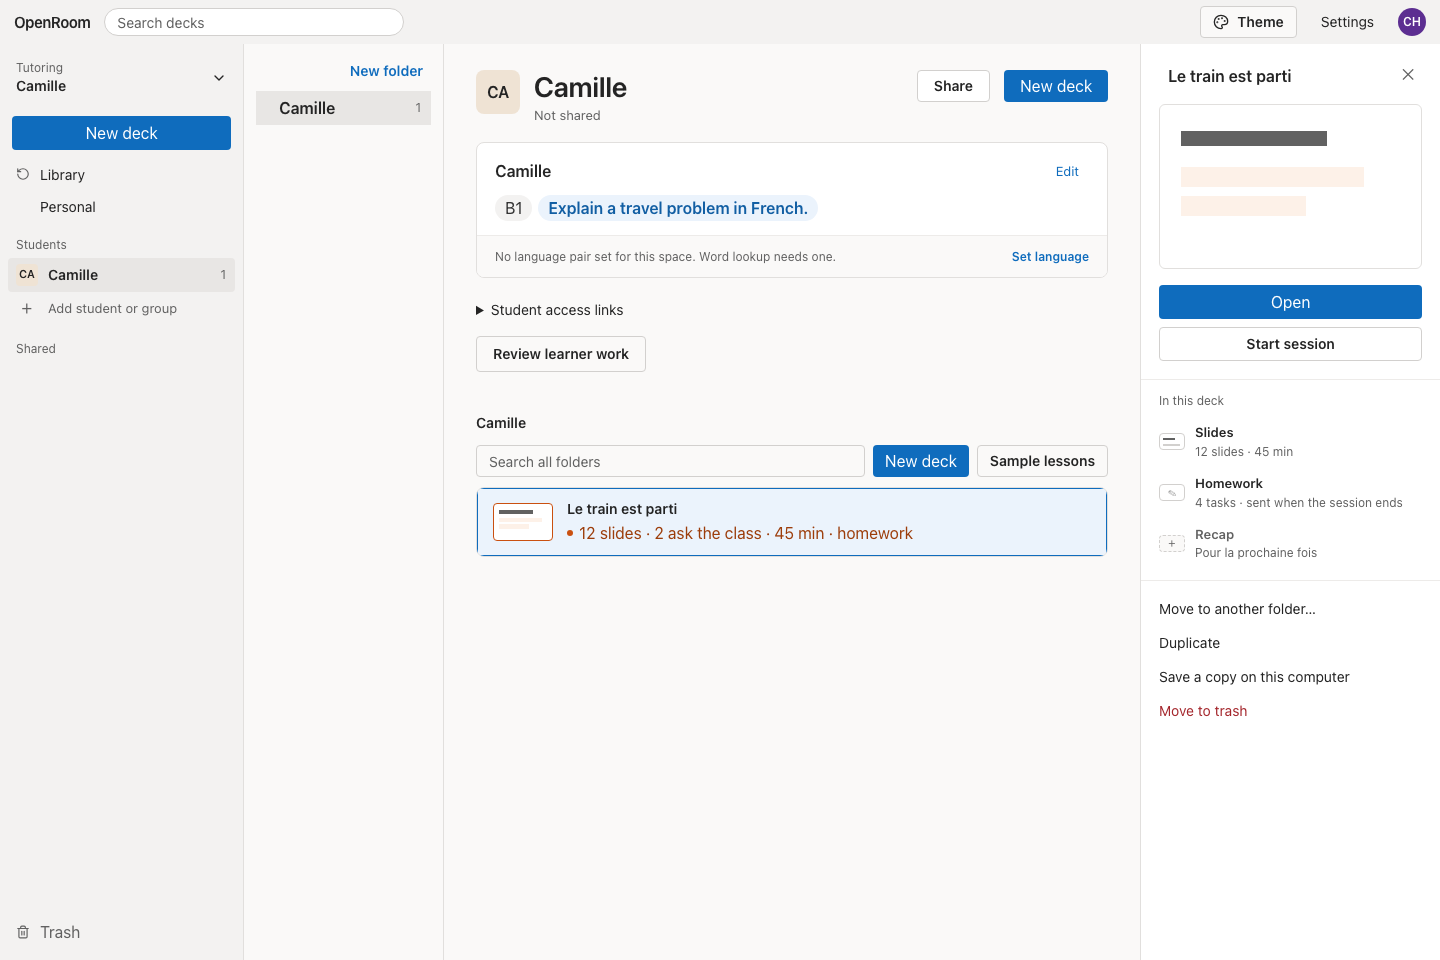
The folder location, selected file, and available file actions remain visible together.
Create and rename folders
Use New folder in the folder browser, type its name, and confirm. To rename a folder, open its context menu and select Rename. Enter the new name and press Enter or move focus elsewhere to commit it. Escape cancels the edit.
Folder creation takes place in the current location. Use the tree and breadcrumb to check that location first.
The folder context menu also provides New folder inside and Duplicate. Folder duplication recreates the folder hierarchy. Duplicate the intended decks separately and move those copies into the new hierarchy.
Create, rename, and move a deck
Select New deck in the intended folder. The new file opens immediately in the editor. If you opened the Library through a selected student or class, the new deck inherits that context. Otherwise the deck starts without a learner context.
To rename a deck from the Library:
- Select the deck.
- Select its title in the details panel.
- Enter the new name.
- Press Enter or select elsewhere to save. Escape cancels the edit.
To move a deck, drag it onto its destination folder or use Move in the details panel. The move picker presents the folder hierarchy; filter it to find a destination. Select the intended location and finish the move.
Right-click a row to open its action menu. Keyboard users can select the row and press Shift+F10. The details panel also provides the deck’s main actions.
Duplicate and download
Use Duplicate to make an independently editable copy. Open the copy and change its title or contents as needed. Check the copy’s folder before moving on.
For a portable file, open the deck editor and select File → Save a copy from the file controls. The export saves the current content and packages its referenced resources. Wait for the file to finish downloading; a failed resource download stops the export and displays an error. Retry after restoring access to the resource.
Open the downloaded file in OpenRoom Desktop. A downloaded file and a cloud deck may carry a link for later synchronization; changes still require the applicable save or sync action.
The Library details panel also offers Save a copy on this computer for the selected deck.
Return to teaching and Notes
Use Live now to rejoin an ongoing session. A deck’s details and its person’s folder provide links to saved results and Notes where available. Follow the Write the notes prompt to complete the session record.
Use the person’s Review learner work link to read homework submissions and publish feedback.
Trash and restore
Select Move to trash in the deck’s details panel and confirm. Folder trash is also available through the folder actions. Read the confirmation to check which item and contents are affected.
Open Trash, find the item, and select Restore. Notes follow the session they belong to; restoring that session restores access to its Notes. Brand kits have their own Trash under Space settings → Brand kits.
For permanent removal, choose the permanent-delete action in Trash. Complete the final confirmation in the signed-in browser before the confirmation link expires. Permanent deletion removes the selected record and its dependent data according to the confirmation shown. An expired confirmation requires a new request.
Editing and trash actions depend on your role in the space. See sharing and permissions.